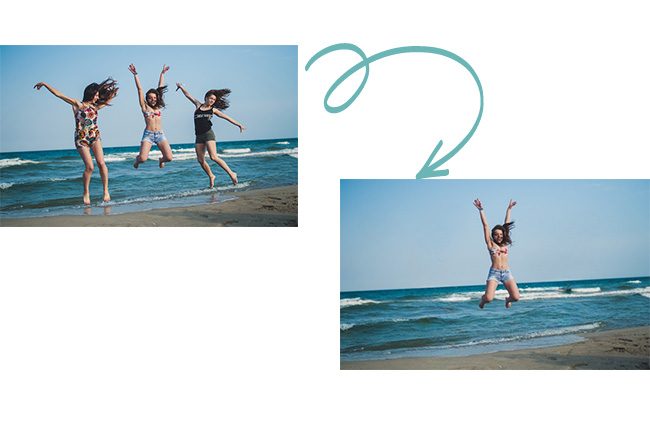
Taking great photos often means capturing special moments with friends and family. However, sometimes you may want to remove unwanted people from your photos to focus on a specific object or landscape. Fortunately, with the help of iPhone apps, you can easily do this without compromising on image quality. In this article, we will explore how to remove people from your photos on iPhone using specialized apps and share valuable tips for achieving stunning results.
Why You Might Want to Remove People from Your Photos
Before we dive into the tools and techniques for removing people from your iPhone photos, it’s important to understand why you might want to do so. Furthermore, there are several reasons why someone might want to perform this edit:
- Privacy: You may want to share a photo publicly, but protect the privacy of people who don't want to be identified.
- Artistic style: Sometimes you may want to create an artistic image that focuses on an object or landscape, eliminating distracting elements such as people.
- Improve composition: Removing unwanted people can improve the overall composition of the image, making it more balanced and appealing.
Now that we know why someone might want to remove people from their photos, let's explore the apps that make this process easier.
People Removal Apps for iPhone
There are several apps available on the App Store that make it easy to remove people from your photos. Here are some of the most popular ones:
- TouchRetouch: TouchRetouch is a powerful tool as it allows you to remove unwanted people and objects from your photos with ease. Moreover, you just need to select the area you want to remove and the app will do the job for you.
- Retouch: This app offers similar features to TouchRetouch, allowing you to remove people, objects, and imperfections from your photos. It's a reliable option for precise edits.
- Photoshop Express: The mobile version of Adobe’s popular photo editing software also offers people removal features. You can use the “Heal” tool to eliminate unwanted elements.
- Snapseed: Snapseed is a full-featured photo editing app that includes an “Object Removal” feature. It’s great for general retouching and image enhancement.
Step by Step: Removing People from Your Photos on iPhone
Now that you know about some useful apps, let's go through a step-by-step guide to remove people from your photos on iPhone using the TouchRetouch app as an example:
Step 1: Download the app – Go to the App Store and download TouchRetouch (or the app of your choice).
Step 2: Open the photo – Open the photo you want to remove people from in the app.
Step 3: Area selection – Use the app’s selection tool to highlight the person you want to remove.
Step 4: Removal – Tap the “Start” or “Remove” button (the name may vary depending on the app) and let the app process the image. It will replace the selected area with a similar background.
Step 5: Finalize and save – After the removal is complete, review the image to ensure that the result is satisfactory. If you are satisfied, save the edited photo to your library.
Keep in mind that the quality of the result depends on the complexity of the scene and the accuracy of the selection. Sometimes you may need to manually adjust some areas to get a perfect result.
Tips for getting the best results
Here are some important tips to ensure you get the best results when removing people from your iPhone photos:
- Choose the right application: Try different apps to find the one that best suits your needs and skills.
- Be patient: Removing people can be a delicate process. Take time to make accurate selections and review the results.
- Make manual adjustments: The application will not always do everything on its own. Sometimes you will need to manually adjust areas where the removal was not perfect.
- Keep an original copy: Before you start editing, make a backup of your original photo. That way, you can always start over if you're not satisfied with the results.
- Practice: Photo editing takes practice. The more you edit, the better you'll become at removing people from your photos naturally.
Removing people from your iPhone photos using specialized apps is an accessible task for anyone interested in improving their images. Plus, with the right apps and some practice, you can create stunning photos with clean compositions and focus on the elements you want to highlight. So, remember to experiment with different apps and techniques to find what works best for you and your specific photos. With dedication, you will become a master in the art of removing unwanted people from your images.
